
DIY Roof Inspection Guide: 7 Safe Checks Every Homeowner Can Do
Your roof silently protects your home 24/7, but how do you know when it needs attention? With the average roof replacement costing around $9,000, catching problems early through DIY inspection can save thousands in repairs. Yet a shocking 95% of roof leaks occur at flashings that many homeowners overlook during casual visual checks.
Every year, thousands of homeowners face unexpected roofing emergencies that could have been prevented through regular inspection. But climbing onto your roof without proper knowledge and safety measures can be dangerous - in 2021 alone, there were 6,900 roofing-related injuries. The key is knowing what you can safely inspect yourself and when to call a professional.
This comprehensive guide will show you exactly what to look for during a DIY roof inspection, from ground-level checks to safely assessing gutters and flashings. You'll learn essential safety protocols, warning signs of common problems, and clear indicators that it's time to bring in an expert. By the end, you'll have the knowledge to protect your home while staying safe.
- Importance of Regular Roof Inspections
- Preparing for a Safe DIY Roof Inspection
- What Homeowners Can Safely Inspect
- Limitations of DIY Inspections and Professional Assistance
- Regional Considerations and Seasonal Maintenance
Importance of Regular Roof Inspections
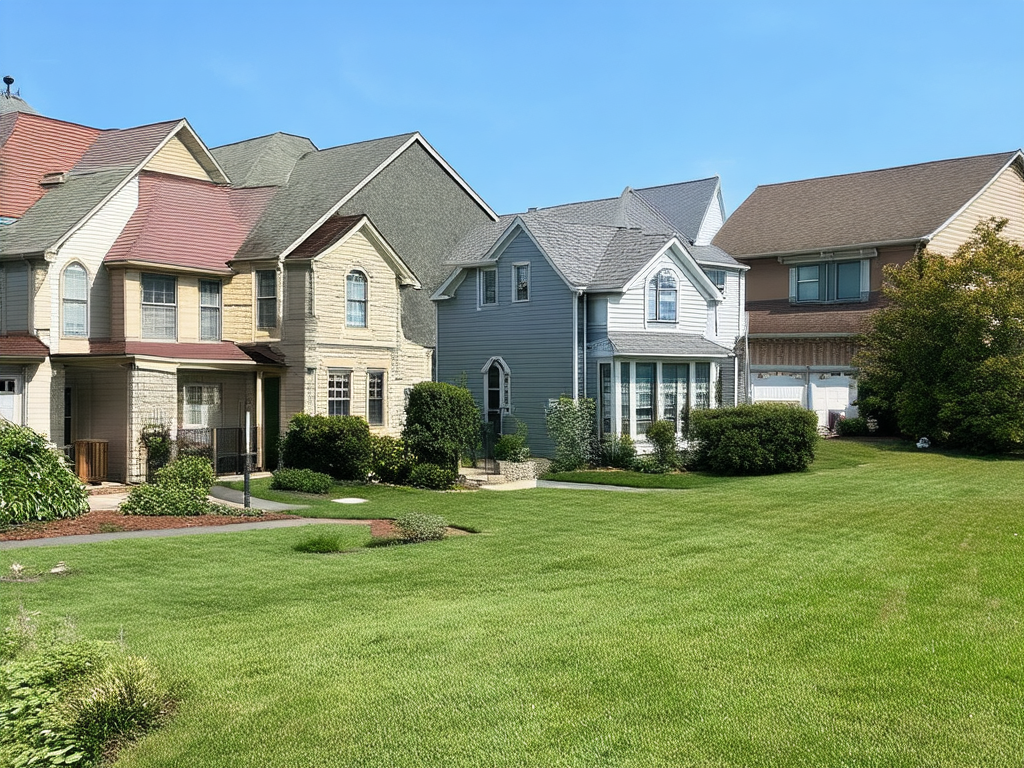
Regular roof inspections are crucial for maintaining your home's value and protecting its structure. Proactive checks can identify minor issues like small leaks or missing shingles before they become major problems requiring a full roof replacement. This saves you time and money in the long run. Regular maintenance also prevents hidden costs like structural damage, higher energy bills, and mold growth. Roofs face constant exposure to harsh weather like rain, snow, wind, and sun. This makes them vulnerable to damage you might not see from the ground. Different roofing materials react differently to weather. For example, wood shake roofing, common in some areas, needs regular checks to prevent rotting and splitting from excess moisture. Regular roof maintenance extends your roof's lifespan and protects your home's structure. It also gives you peace of mind knowing your roof is in good condition. Consider scheduling a roof assessment for a comprehensive evaluation.
Key Statistics on Roof Damage and Maintenance
Understanding roof damage statistics highlights the importance of regular inspections. In 2021, roofing contractors reported 6,900 injuries, a 17% increase from the previous year. Falls caused most of these injuries. Roofers face hazards from working at heights, using ladders, and navigating slippery or unstable roofs. This emphasizes the dangers of neglecting maintenance and the importance of hiring qualified professionals for complex roofing work. Roof repair costs typically range from $379 to $1,755, averaging around $1,067. Factors like the roof's age and materials affect the cost. While repairs can be expensive, replacements cost even more, ranging from $5,900 to $12,900 and averaging about $9,000. Replacements are more costly because they involve removing the old roof, installing new materials, and fixing any underlying structural problems. Regular inspections can catch small problems early and help you avoid these high replacement costs. You can learn more about roof maintenance to understand preventive measures. Homeowners' insurance often covers wind and hail damage, which are common after storms. Documenting any damage with photos and records is essential for filing a claim. However, some policies have limits or exclusions, so review your policy details. Common mistakes when filing claims include overlooking minor damage, delaying assessments, and not providing enough documentation.
| Service | Average Cost | Range |
|---|---|---|
| Roof Repair | $1,067 | $379 - $1,755 |
| Roof Replacement | $9,000 | $5,900 - $12,900 |
Common Roof Problems and Their Causes
Several common roof problems have specific causes that inspections can reveal. Water damage often comes from leaks around flashings, which cause 95% of roof leaks. Improperly installed flashing lets water in, leading to leaks. Flashings are usually found around chimneys, vents, skylights, and other areas where things go through the roof. Algae and moss, shown by black streaks or green patches, grow in damp, shady spots and gradually damage your roof. Strong winds, hail, or improper installation can cause missing or damaged shingles, making your roof leak-prone. Damaged shingles might be cracked, curled, or missing altogether. While less common, holes can also result from severe weather or impacts. Poor drainage from clogged gutters or downspouts creates standing water, which wears down roofing materials faster. Regular inspections can catch these problems early and prevent expensive damage. Inspect your roof twice a year, in spring and fall, and after major storms.

Preparing for a Safe DIY Roof Inspection
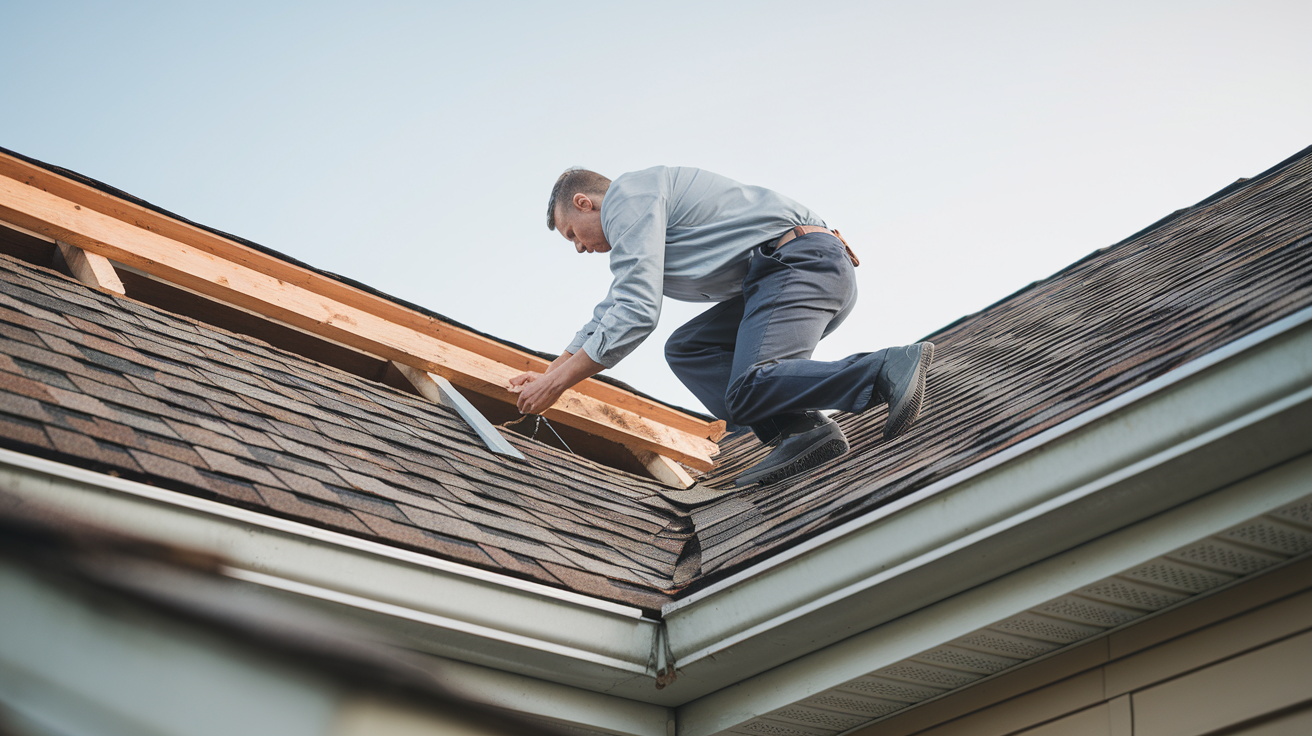
Conducting a DIY roof inspection can save you money and prevent extensive damage by catching potential issues early. However, safety should always come first. With the right tools, equipment, and safety procedures, you can thoroughly inspect your roof and ensure its longevity. This section will guide you through the essential tools and equipment and highlight critical safety precautions.
Essential Tools and Equipment for Inspection
Gathering the necessary tools before you start ensures a comprehensive and efficient roof inspection.
Ladder
A sturdy ladder is essential for safe roof access. Choose one that extends at least three feet above the roof edge for safe mounting and dismounting. Ensure it has non-slip feet for stability.
Binoculars
Binoculars are invaluable for examining hard-to-reach areas without climbing onto the roof. You can use them to check the condition of shingles or flashing around chimneys.
Flashlight
A flashlight is crucial for inspecting shaded areas or the attic for leaks or water damage. It helps identify moisture signs like stains or rot.
Other Essential Tools
- Wear slip-resistant shoes for traction on the roof to prevent falls.
- Keep a roofing hammer and utility knife handy for minor repairs only if you're experienced. If you're not comfortable with repairs, contact a qualified roofing professional to avoid further damage or injury.
- A notebook and camera help document damage for future reference or when contacting contractors. Focus on photographing areas with visible damage or potential issues.
Safety Precautions and Procedures to Follow
Safety is paramount during a DIY roof inspection.
Check the Weather
Check the forecast and avoid inspections during rain, wind, or icy conditions to prevent slips and falls. Also, avoid extreme heat to prevent heat exhaustion or heatstroke.
Use a Safety Harness
Always use a harness when walking on the roof, especially on steep pitches. A harness, attached to a secure anchor point like a chimney or roof anchor, prevents serious falls.
Ladder Safety
Place your ladder on a stable, flat surface and lock it securely. Maintain three-point contact—two hands and one foot or two feet and one hand—at all times for maximum stability. If possible, have someone hold the ladder for extra stability. If you're alone, double-check the ladder's stability before climbing.
Roof Safety
Be mindful of power lines and tripping hazards like loose shingles or debris. Never walk backward or move without looking. If you're uncertain about any aspect of the inspection, especially if the roof is high, steep, or complex, or if you're uncomfortable with heights, call a professional. If you notice significant damage or suspect a structural issue, a professional roofer is the best choice. Get Your Roof Assessment can provide additional peace of mind. You can also learn more about roof maintenance to understand the importance of regular checks. By following these precautions, you can conduct a safe and effective DIY roof inspection.
What Homeowners Can Safely Inspect
Conducting a DIY roof inspection offers homeowners a practical way to identify early signs of damage, potentially saving on costly repairs down the road. Safety should always be the top priority. Many checks can be performed from the ground or with minimal, safe climbing. For example, homeowners can use binoculars to check shingles from the ground or a sturdy ladder to inspect gutters. This section outlines what homeowners can safely inspect themselves, focusing on shingle and tile damage, gutter and flashing conditions, and signs of leaks and water damage.
Identifying Shingle and Tile Damage
Shingles and tiles are a roof's primary defense against the elements. Their condition is crucial for maintaining the roof's integrity. Homeowners can safely inspect these components from the ground using binoculars.
Signs of Damage to Look For
- Missing Shingles: These are usually easy to spot.
- Cracked Shingles: Cracks often appear as thin lines or breaks on the shingle's surface.
- Curled Shingles: The edges of curled shingles lift away from the roof.
- Discoloration: Dark patches or discoloration may indicate algae or mold growth, potentially shortening the roof's lifespan if left untreated.
Understanding Discoloration
While some discoloration results from normal weathering, dark streaks often signal algae growth. Black or green patches could indicate mold. Regularly checking for these signs helps prevent more serious damage requiring expensive repairs or even a full roof replacement. For a professional assessment, consider our Get Your Roof Assessment.
Assessing Gutter, Downspout, and Flashing Conditions
Gutters and downspouts channel water away from your roof and foundation. Flashing prevents leaks at roof joints. Homeowners can inspect these areas relatively easily.
Gutter and Downspout Inspection
Gutters and downspouts should be checked for blockages from leaves or debris, which can cause overflows and damage.
| Inspection Step | Action |
|---|---|
| Observe During Rainfall | Look for overflowing water |
| Use a Ladder Safely | Inspect for debris buildup |
Flashing Inspection
Flashing, typically found around chimneys and skylights, can be inspected from the ground. Look for rust or detachment. Since 95% of roof leaks originate at flashing points, addressing these issues promptly prevents water damage and further roof degradation. Learn more about roof maintenance to understand the importance of flashing.
Why Flashing is Vulnerable
Flashing is a common point of failure. It seals vulnerable joints and intersections on the roof, such as around chimneys, vents, and skylights.
Spotting Leaks and Water Damage from the Ground
Water damage often indicates a roofing problem. Homeowners can check for leaks without climbing on the roof.
Interior Checks
Inspect ceilings and attic spaces for:
- Water stains
- Dark spots
- Sagging
These signs may point to a leak needing immediate attention to prevent structural damage.
Exterior Checks
Also, check exterior walls for water marks or mold growth, which can reveal hidden problems.
Differentiating Roof Leaks from Plumbing Leaks
Both roof and plumbing leaks can cause similar signs. Roof leaks often appear after rainfall and are typically located near exterior walls or under ceilings directly below the roof. Plumbing leaks can happen anytime and are usually concentrated near pipes or fixtures. By identifying these issues early, homeowners can make repairs before the damage becomes extensive, protecting their home's structure and value.
Limitations of DIY Inspections and Professional Assistance
DIY roof inspections offer homeowners a proactive way to maintain their homes. However, these inspections have limitations, especially regarding safety and identifying hidden damage. This section explores these limitations and explains when professional help is necessary.
Recognizing When Professional Help is Needed
Homeowners can often spot obvious issues like missing shingles or clear leaks. However, some problems require a trained eye. Internal structural problems, like weakened trusses or hidden water damage, are hard to see without experience. Sagging ceilings inside or an uneven roofline from outside can indicate hidden damage. Professionals have the right tools and safety gear for thorough, safe inspections. This equipment might include safety harnesses, specialized ladders, and tools to assess the roof's structure. Learn more about roof maintenance Recognizing the limits of DIY inspections can prevent small problems from becoming big, expensive repairs. Industry data shows roofers face many hazards, including working at heights and using power tools and electricity. In 2021, roofing contractors suffered 6,900 injuries, a 17% increase from the year before.
Cost Implications of Professional Inspections and Repairs
Hiring a professional involves cost. A professional roof inspection typically costs between $120 and $300, depending on the roof and location. While this is an expense, it can save money in the long run. Roof repairs average between $379 and $1,755, with some exceeding $5,000. A full roof replacement costs around $9,000 on average. Early professional inspections can reduce the need for a full replacement. Get Your Roof Assessment DIY inspections are good for finding obvious problems. But, professional help is essential for complete roof care and finding hidden issues early.
Regional Considerations and Seasonal Maintenance
Understanding regional and seasonal factors is crucial for maintaining your roof and extending its lifespan. Different climates present unique challenges, requiring specific maintenance strategies. For example, roofs in snowy regions must withstand heavy snow loads and prevent ice dams, while roofs in hot, arid climates must resist UV radiation and thermal expansion. Tailoring your maintenance to your climate and the season protects your home from weather-related damage.
Impact of Climate on Roof Damage and Material Choices
Climate significantly impacts the type of roof damage you might face and influences material choices. In regions with heavy rain or snow, moisture-resistant materials like metal or asphalt shingles are often preferred to mitigate leaks and water damage. Roof repair costs can range from $379 to $1,755, averaging around $1,067, depending on factors like the roof's age and the damage extent. In hot, sunny climates, reflective materials like cool roofs or certain tiles can reduce heat absorption and lower cooling costs. This is especially important in areas like Texas, which experiences high temperatures and sees many expensive roof damage claims due to hail and wind. Regional weather patterns also require consideration. In hail-prone areas, impact-resistant shingles offer extra protection, potentially saving homeowners from extensive damage and high repair costs, which can average around $4,250. In 2022 alone, convective storms (including hail and wind) caused $29 billion in roofing claims. Understanding these regional differences is crucial for choosing materials that can withstand your area's unique weather challenges. Consider getting a Get Your Roof Assessment to determine the best roofing materials for your specific needs.
Seasonal Maintenance Tips to Prevent Common Issues
Seasonal maintenance proactively prevents common roofing problems.
Spring Maintenance
In spring, inspect for winter damage from ice and snow. Check for leaks, ceiling stains, and clear debris from gutters for proper drainage. Water damage is a frequent sign of roof problems and can cause mold if not addressed. Learn more about roof maintenance to understand the importance of spring inspections.
Summer Maintenance
Summer maintenance focuses on checking for UV damage and ensuring proper ventilation to prevent heat buildup. Look for common damage signs: discolored areas (possibly algae), missing shingles, or holes.
Fall Maintenance
Fall is the time to prepare for winter. Clear gutters and downspouts of leaves and ensure secure flashing around chimneys and vents. This prevents winter water damage by directing water away from vulnerable areas.
Winter Maintenance
In winter, watch for ice dams and remove snow buildup to reduce stress on your roof. Excessive snow can weaken the roof, potentially leading to collapse. By following these seasonal tips and performing regular maintenance and inspections, you can address minor issues before they become major problems, ensuring your roof's longevity and integrity. Even well-designed roofs need proper care to prevent damage.
Disclaimer: This blog post is intended for informational purposes only and should not be considered professional roofing advice. Always consult with qualified roofing contractors and insurance professionals for specific guidance regarding your individual circumstances.